
Slicing software such as Cura and Simplify 3D allows the user to take a 3D design file and generate a set of instructions that breaks down the file into a language that the 3D printer can understand to print the part. The .gcode files that are exported usually consist of 1000s of lines of information. They are mostly coordinates and extruder movements, but there are a lot of settings that need to be initially set. Some settings also change depending on the object being printed in order to achieve the best quality print..
We will use this series to cover every slicer setting available in Simplify 3D. This is our slicing software of choice, but many of the settings are similar across different slicers.
This first week will discuss the extruder settings for your printer.
Extruder Toolhead Index
This setting is an identifier that corresponds with the extruder head decided in the firmware on the printer. Most of the time, this is not important to most people with a single extruder printer. If this is the case, then the general convention is set as T0. If you do have a multiple extruder printer, the typical convention is T0 is the rightmost extruder and it goes up from there. If you are having issues, then you can change the firmware of the printer if you are able to make each extruder match whatever notation you would like. Or, you can run a test print with different toolheads selected and determine which toolhead corresponds to which extruder index number.
Nozzle Diameter
This setting describes the diameter of the hole in the nozzle where the filament comes out. The standard size nozzle is usually 0.4mm. The nozzle can be changed to have a different diameter, different length, or different material. Changing the diameter allows you to print at larger or smaller layer heights. Larger nozzles decrease the resolution while increasing print speed. Smaller nozzles allow for high resolution and finer details, but also increase the print time. Changing the length allows for better heat transfer by using a longer nozzle. Changing the material allows for the use of abrasive materials like composites.
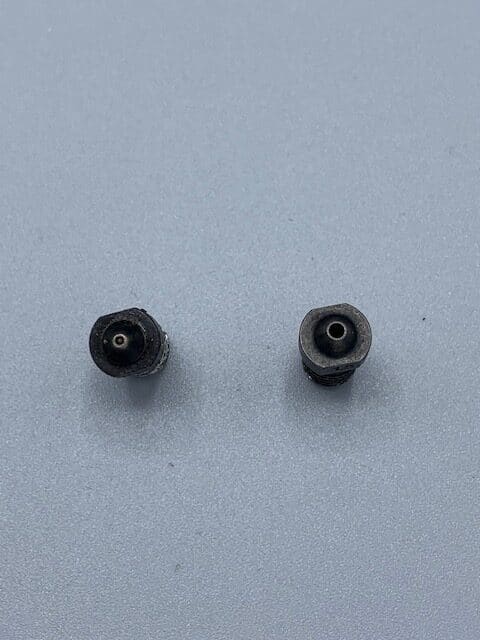
If you are unaware of what size you are currently using, then you can consult your printer’s user manual. However, sometimes they are labeled with the diameter in mm or labeled using a dot system denoting the diameter.
Extrusion Multiplier
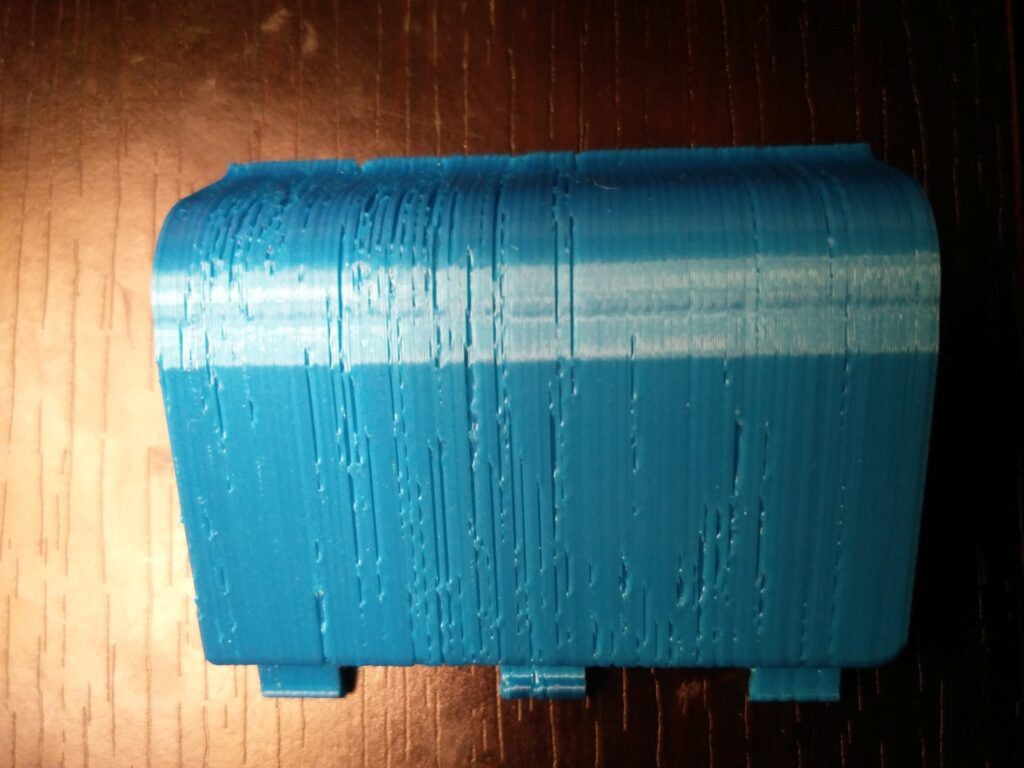
The extrusion multiplier allows you to control how much material is coming out of the nozzle. Based on this value, the printer knows how quickly to move the extruder gear to push out material. It typically is defaulted to 0.9 for PLA and 1.00 for ABS in Simplify3D. Depending on the material and your printer, the extrusion multiplier may need to be adjusted. Typically, this value is in the range of 0.9-1.1. If you are outside of this range, then there may be another problem with your printer such as an underpowered extruder stepper motor or a partially clogged nozzle.
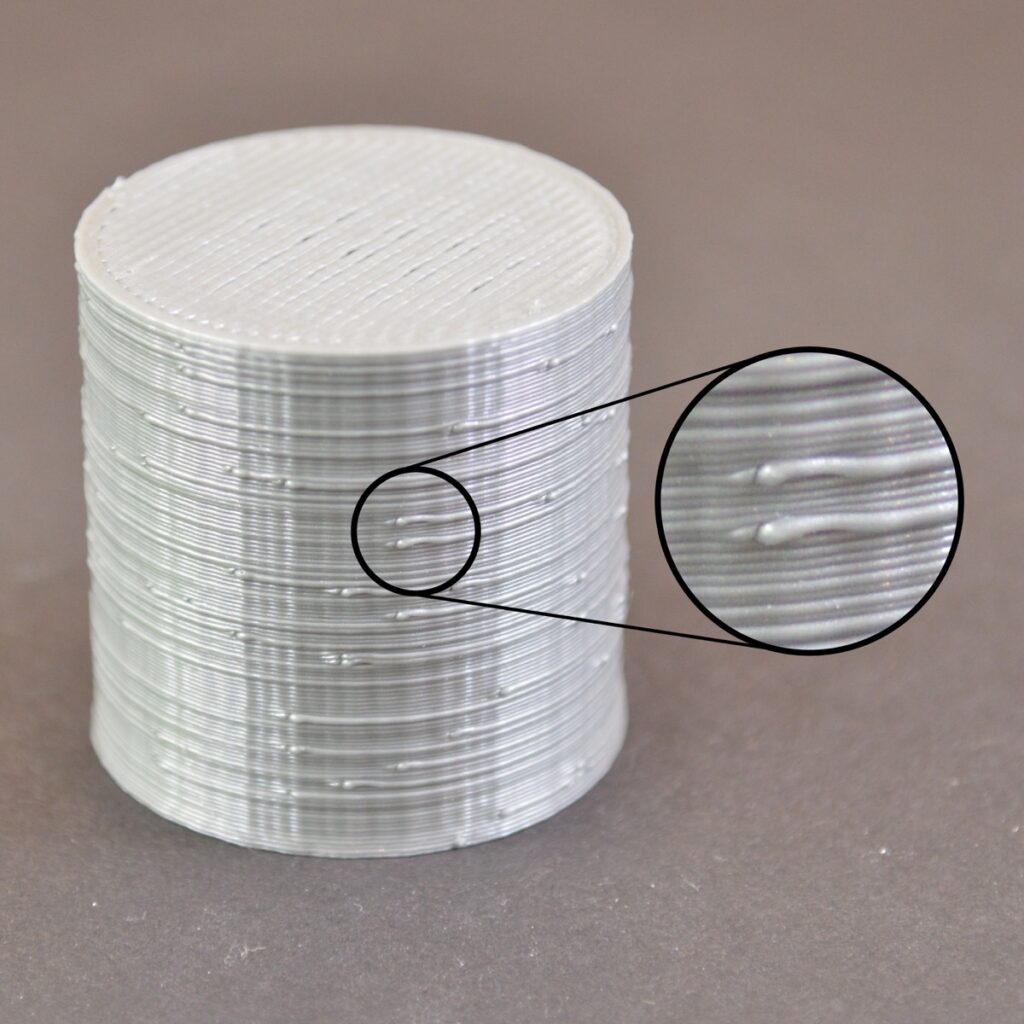
The best way to determine this value is to use the default settings and run a test print. Under-extruded parts will have small voids in the top layers of the part and over-extruded parts will leave a rough surface and blobs. If you are not seeing any problems, then stick with the default values. If you are seeing issues, then try increasing the amount of top layers first. If you still see issues, then you should calibrate it. To do this, print a single layer thick cube or flat sheet with the extrusion multiplier set to 1.00 and measure the thickness with a micrometer or calipers. The extrusion multiplier will be the set extrusion width over the average actual wall thickness.
Retraction distance
Retraction is the process of using the extruder gear to pull back the material out of the nozzle. This is done to avoid material leaking out of the nozzle during extruder movement where there isn’t supposed to be material. If retraction is not set properly, then this is what causes “stringing” which is all of the little bits of material hanging between parts of the actual printed piece. Retraction distance is how far back the material is moved out of the nozzle before traveling. Higher values correspond to longer distances which move the material further away from the nozzle tip. If it’s too low, then material can still come out during travel. If it’s too high, then it can increase print time and cause clogs.
You don’t want to retract the material greater than the length of your nozzle as this will pull the material completely out of the nozzle and can allow it to cool. Common values are in the range of 2-7mm depending on your printer. To set this properly, you can either research what other users are doing, or start at 2mm and incrementally move it up with different test prints to tune it.
Extra restart distance
This setting essentially modifies the distance the material is pushed back after retraction. If left as 0, it will push back the material exactly the distance the retraction distance is set at. However, if this is set to a negative value, then it will push it back less than the retraction distance. If positive, then it will push further after retraction. For example, if you set the retraction distance to 3, and then set the extra restart distance to -0.5, the extruder will retract the filament 3mm. Then, when it needs to start printing again, it will only push the material back out 2.5mm before starting to print. If you are seeing voids after a travel initially, then this means that you will need to add a positive extra restart distance. If you are seeing blobs or zits where the printer starts printing again after a travel, then you should use a negative extra restart value to adjust.
Retraction vertical lift
This value adjusts how high the extruder moves up before retracting and traveling. Theoretically, if your print is perfectly flat, then this can be left at 0. However, if your print is warped even slightly, or there is some stringing or blobs, then the extruder can crash into these while moving. This causes it to pop the build plate off of the print, burn your part, and cause a layer shift. It is recommended to set this value to 1 layer height. So if you are printing at a 0.2mm layer height, then this should be set at 0.2mm. If you have a lot of small travels, then you may need to increase this setting to 2 layers worth or more.
Retraction speed
This is how quickly the extruder moves when it is retracting material. If this is set too low, then the filament could have time to leak filament from the nozzle creating stringing or blobs. If it is too high, then there will be a delay before material extrudes again. Typical values for retraction speed are 1200mm/min or 20mm/sec. If you need to adjust this, then do it slowly in increments of 5mm/s.
Coast at end/Coast distance
The coast at end checkbox enables or disables extruder coasting. Extruder coasting is when the extruder stops spinning for a certain distance before the tool path ends. This allows for any pressure that might be building up in the nozzle to escape. Nozzles can build up pressure by trying to squeeze the plastic through a very tiny nozzle diameter; this can result in blobs on your print. If the coast at end box is checked, then the coasting distance needs to be set. The default distance is 0.2mm. If you need to change this, then do so in increments of 01.mm.
Wipe nozzle/Wipe distance
Wipe nozzle is the process where at the end of a toolpath before traveling, the nozzle will actually trace the previously laid path with the extruder off for a certain distance. This is called the wipe distance before traveling. This helps to avoid stringing and blobs as well– any material that may be stringing is deposited over the part. If the wipe nozzle box is selected, then the wipe distance can be specified. The default value in Simplify3D is 5mm. Increasing this will increase print time. If your retraction settings are set properly, then this feature should be redundant and unnecessary. If you are experiencing stringing and blobs, then it is recommended to revisit your retraction settings first before utilizing the wipe nozzle function.
If you have any great ideas you want to get designed or printed contact us at project@the3dprintingstore.com Or call at +1 720-443-3733