
There are a number of reasons why you should have your 3D printer repaired as soon as possible. 3D printers are complex machines, and they can break down for a variety of reasons. We have listed four of the most important reasons why you should have your 3D printer repaired as soon as possible. Contact the 3D Printing Store in Denver, CO, and Dallas, TX, for on-demand 3D printer repair services today!
Less Expensive Than Buying a New Printer
3D printer repair is less expensive than purchasing a brand new model. At the 3D Printing Store, our repair services start at only $99.99! Compared to other 3D printer repair companies, our price is the best deal around. This cost includes a 20-point inspection, a complete rundown of our diagnostics, a free test printer and slicer to give you a reference for any adjustments needed, and a comprehensive report with our recommendations.

Extends the Life of Your Printer
Having your 3D printer repaired by the 3D Printing Store can extend the life of your printer. If you have a 3D printer that is not working correctly or if it is old and outdated then you may want to consider having it repaired. By repairing your 3D printer, you can prolong its life and use it for many years to come.
Restore the Printer to its Original Condition
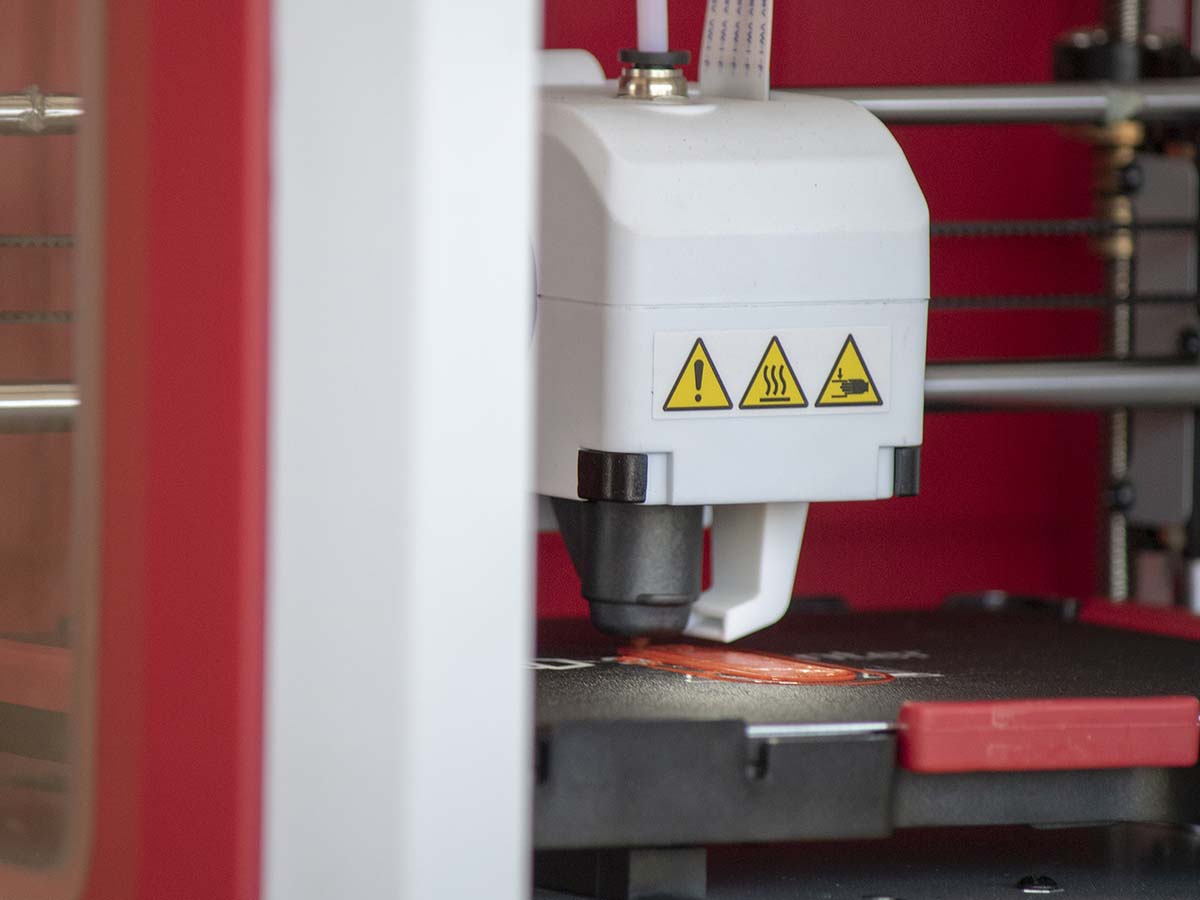
By repairing any damage to your printer, you can restore it back to its original condition. If your 3D printer’s filament is not fitting, the printer won’t turn on, if there’s not enough plastic on your first layer, or it’s overheating, then you may want to stop by the 3D Printing Store to have it repaired. Our technicians will be able to repair your printer in no time, leaving it in like-new condition.
Improves Your Printing Experience
The last reason you should have your 3D printer repaired is that it can improve your printing experience. When you have a 3D printer that has been broken and malfunctioning for a long time, it may be difficult and irritating to use at times. Repairing your 3D printer ensures that it works properly no matter what you’re using it to print, allowing you to enjoy using this innovative technology in your home office, business or workshop.
In conclusion, there are a number of good reasons to have your 3D printer repaired. If your 3D printer has stopped working, then the best option is to get it repaired as soon as possible because this lets you save money in the long term, ensures that your 3D printer works like new again, and extends its lifetime. Contact the 3D Printing Store located in Denver, CO, and Dallas, TX, for repair services today!
3D printing service bureaus are a new and innovative way to get 3D printed parts and objects. 3D printers are becoming more affordable, but they can be tricky to use for those without experience or expertise in the field. This is where the 3D Printing Store comes in! From designing and scanning to creating prototypes and models, we can do it all quickly and efficiently, without the huge expense. We will discuss four reasons why you should consider using a 3D printing service bureau, such as ourselves. Contact us today to learn more!
Advanced Equipment and Materials
Our service bureau has invested in the latest and greatest technology to ensure that your prints are of the highest quality. We use advanced equipment like laser sintering printers, digital light processing and fused deposition modeling printers to produce parts quickly and accurately. In addition, we only use materials from leading suppliers to guarantee quality results.
DIY 3D Printing Can Be a Big Financial Investment
When you factor in the cost of a quality 3D printer, replacement parts, upgrades, and filament, printing at home or for your business can quickly become an expensive endeavor. In many cases, using a service bureau is more cost effective than trying to print large volumes yourself. At the 3D Printing Store, we provide affordable and honest prices for all of our work. Get a quote today!
Equipped to Deal with Part Complexity or Volume
Most likely, you don’t have the right equipment to print in large volumes. Using a service bureau will allow for larger production runs without sacrificing quality or speed of delivery. We have many options available depending on your project requirements, so be sure to talk with one of our experts before deciding what would be the best fit for your needs.
Benefit from 3D Printing Expertise
At our service bureau, you can benefit from years of experience in the 3D printing industry. Our team has successfully worked on thousands of projects and will work closely with you to ensure that your project is completed according to your requirements, and will exceed your expectations.
The 3D Printing Store will save you more time and money compared to traditional manufacturing. With our experience and top-of-the-line technology, we will be able to handle any project you throw at us. If you’re looking to get a project printed, or you have some questions about our services, please don’t hesitate to contact the 3D Printing Store located in Denver, CO, and Dallas, TX! We would be happy to answer all of your questions.
Slicing software such as Cura and Simplify 3D allows the user to take a 3D design file and generate a set of instructions that breaks down the file into a language that the 3D printer can understand to print the part. The .gcode files that are exported usually consist of 1000s of lines of information. They are mostly coordinates and extruder movements, but there are a lot of settings that need to be initially set. Some settings also change depending on the object being printed in order to achieve the best quality print..
We will use this series to cover every slicer setting available in Simplify 3D. This is our slicing software of choice, but many of the settings are similar across different slicers.
This first week will discuss the extruder settings for your printer.
Extruder Toolhead Index
This setting is an identifier that corresponds with the extruder head decided in the firmware on the printer. Most of the time, this is not important to most people with a single extruder printer. If this is the case, then the general convention is set as T0. If you do have a multiple extruder printer, the typical convention is T0 is the rightmost extruder and it goes up from there. If you are having issues, then you can change the firmware of the printer if you are able to make each extruder match whatever notation you would like. Or, you can run a test print with different toolheads selected and determine which toolhead corresponds to which extruder index number.
Nozzle Diameter
This setting describes the diameter of the hole in the nozzle where the filament comes out. The standard size nozzle is usually 0.4mm. The nozzle can be changed to have a different diameter, different length, or different material. Changing the diameter allows you to print at larger or smaller layer heights. Larger nozzles decrease the resolution while increasing print speed. Smaller nozzles allow for high resolution and finer details, but also increase the print time. Changing the length allows for better heat transfer by using a longer nozzle. Changing the material allows for the use of abrasive materials like composites.
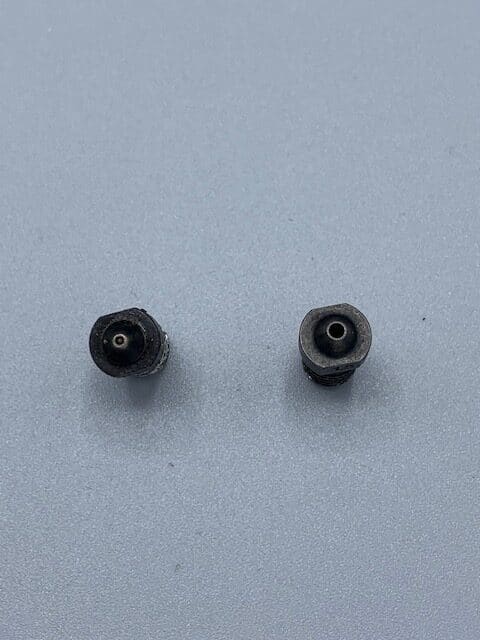
If you are unaware of what size you are currently using, then you can consult your printer’s user manual. However, sometimes they are labeled with the diameter in mm or labeled using a dot system denoting the diameter.
Extrusion Multiplier
The extrusion multiplier allows you to control how much material is coming out of the nozzle. Based on this value, the printer knows how quickly to move the extruder gear to push out material. It typically is defaulted to 0.9 for PLA and 1.00 for ABS in Simplify3D. Depending on the material and your printer, the extrusion multiplier may need to be adjusted. Typically, this value is in the range of 0.9-1.1. If you are outside of this range, then there may be another problem with your printer such as an underpowered extruder stepper motor or a partially clogged nozzle.
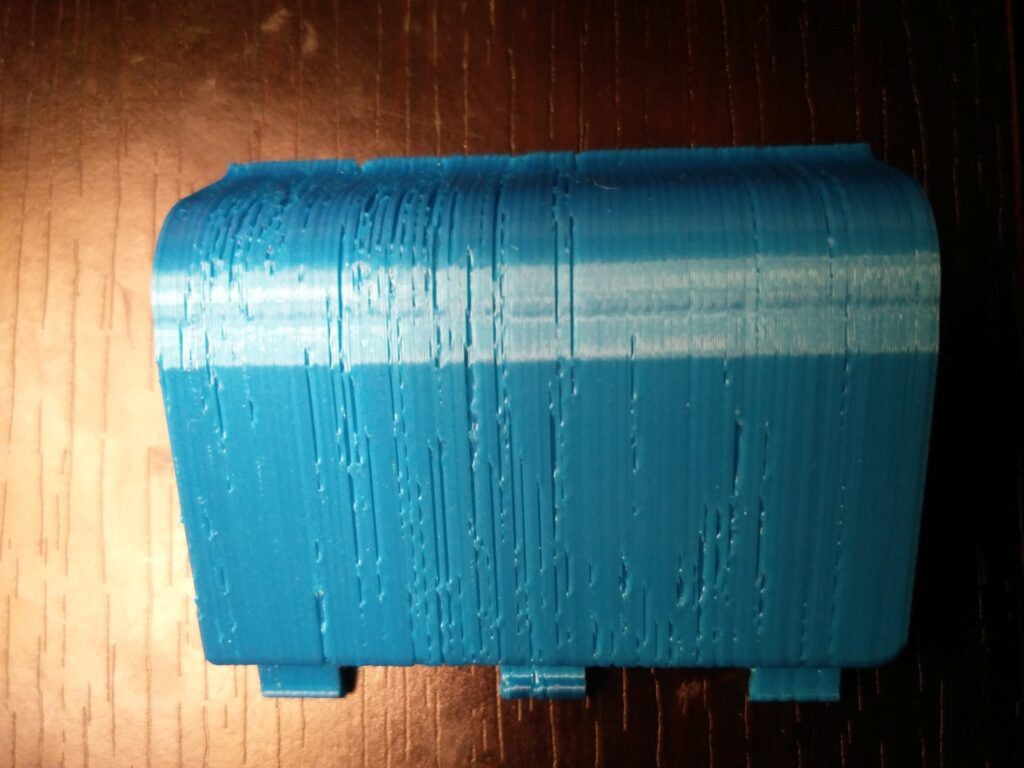
The best way to determine this value is to use the default settings and run a test print. Under-extruded parts will have small voids in the top layers of the part and over-extruded parts will leave a rough surface and blobs. If you are not seeing any problems, then stick with the default values. If you are seeing issues, then try increasing the amount of top layers first. If you still see issues, then you should calibrate it. To do this, print a single layer thick cube or flat sheet with the extrusion multiplier set to 1.00 and measure the thickness with a micrometer or calipers. The extrusion multiplier will be the set extrusion width over the average actual wall thickness.
Retraction distance
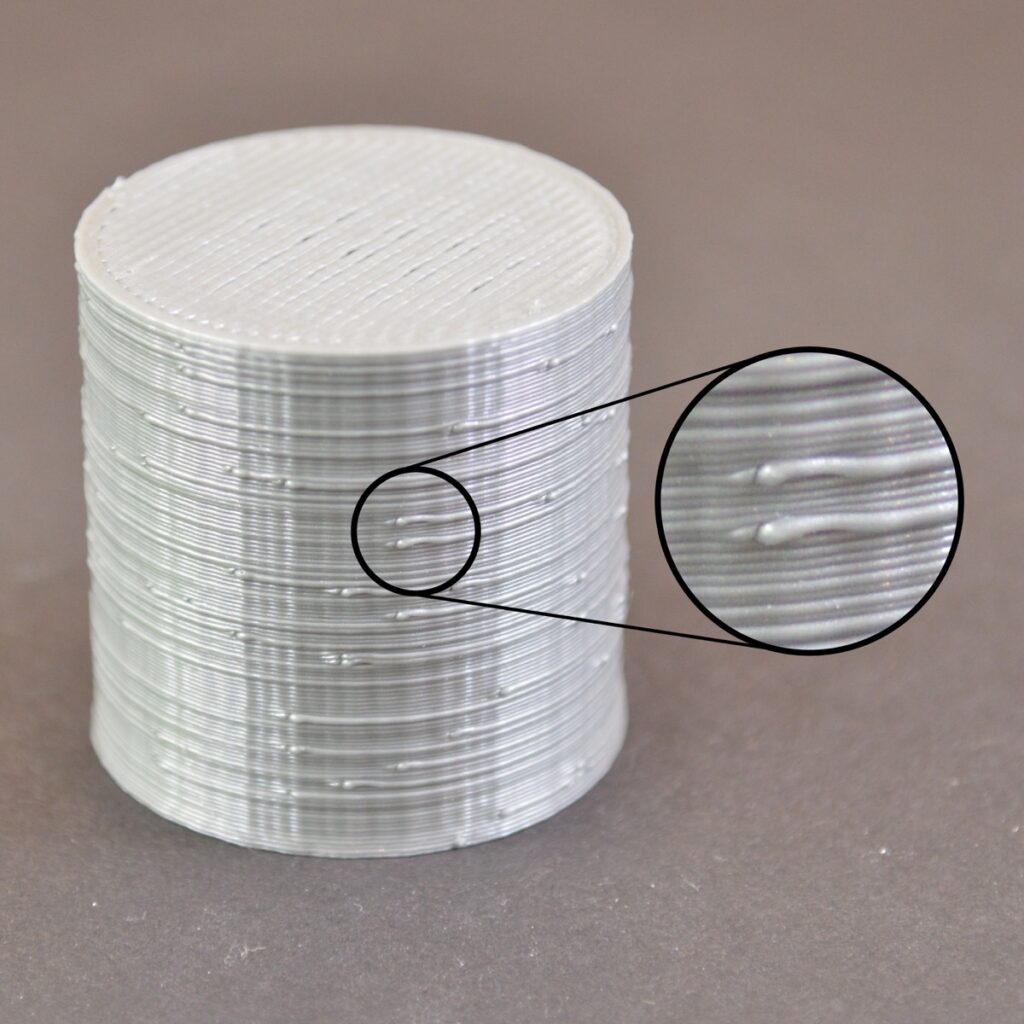
Retraction is the process of using the extruder gear to pull back the material out of the nozzle. This is done to avoid material leaking out of the nozzle during extruder movement where there isn’t supposed to be material. If retraction is not set properly, then this is what causes “stringing” which is all of the little bits of material hanging between parts of the actual printed piece. Retraction distance is how far back the material is moved out of the nozzle before traveling. Higher values correspond to longer distances which move the material further away from the nozzle tip. If it’s too low, then material can still come out during travel. If it’s too high, then it can increase print time and cause clogs.
You don’t want to retract the material greater than the length of your nozzle as this will pull the material completely out of the nozzle and can allow it to cool. Common values are in the range of 2-7mm depending on your printer. To set this properly, you can either research what other users are doing, or start at 2mm and incrementally move it up with different test prints to tune it.
Extra restart distance
This setting essentially modifies the distance the material is pushed back after retraction. If left as 0, it will push back the material exactly the distance the retraction distance is set at. However, if this is set to a negative value, then it will push it back less than the retraction distance. If positive, then it will push further after retraction. For example, if you set the retraction distance to 3, and then set the extra restart distance to -0.5, the extruder will retract the filament 3mm. Then, when it needs to start printing again, it will only push the material back out 2.5mm before starting to print. If you are seeing voids after a travel initially, then this means that you will need to add a positive extra restart distance. If you are seeing blobs or zits where the printer starts printing again after a travel, then you should use a negative extra restart value to adjust.
Retraction vertical lift
This value adjusts how high the extruder moves up before retracting and traveling. Theoretically, if your print is perfectly flat, then this can be left at 0. However, if your print is warped even slightly, or there is some stringing or blobs, then the extruder can crash into these while moving. This causes it to pop the build plate off of the print, burn your part, and cause a layer shift. It is recommended to set this value to 1 layer height. So if you are printing at a 0.2mm layer height, then this should be set at 0.2mm. If you have a lot of small travels, then you may need to increase this setting to 2 layers worth or more.
Retraction speed
This is how quickly the extruder moves when it is retracting material. If this is set too low, then the filament could have time to leak filament from the nozzle creating stringing or blobs. If it is too high, then there will be a delay before material extrudes again. Typical values for retraction speed are 1200mm/min or 20mm/sec. If you need to adjust this, then do it slowly in increments of 5mm/s.
Coast at end/Coast distance
The coast at end checkbox enables or disables extruder coasting. Extruder coasting is when the extruder stops spinning for a certain distance before the tool path ends. This allows for any pressure that might be building up in the nozzle to escape. Nozzles can build up pressure by trying to squeeze the plastic through a very tiny nozzle diameter; this can result in blobs on your print. If the coast at end box is checked, then the coasting distance needs to be set. The default distance is 0.2mm. If you need to change this, then do so in increments of 01.mm.
Wipe nozzle/Wipe distance
Wipe nozzle is the process where at the end of a toolpath before traveling, the nozzle will actually trace the previously laid path with the extruder off for a certain distance. This is called the wipe distance before traveling. This helps to avoid stringing and blobs as well– any material that may be stringing is deposited over the part. If the wipe nozzle box is selected, then the wipe distance can be specified. The default value in Simplify3D is 5mm. Increasing this will increase print time. If your retraction settings are set properly, then this feature should be redundant and unnecessary. If you are experiencing stringing and blobs, then it is recommended to revisit your retraction settings first before utilizing the wipe nozzle function.
If you have any great ideas you want to get designed or printed contact us at project@the3dprintingstore.com Or call at +1 720-443-3733
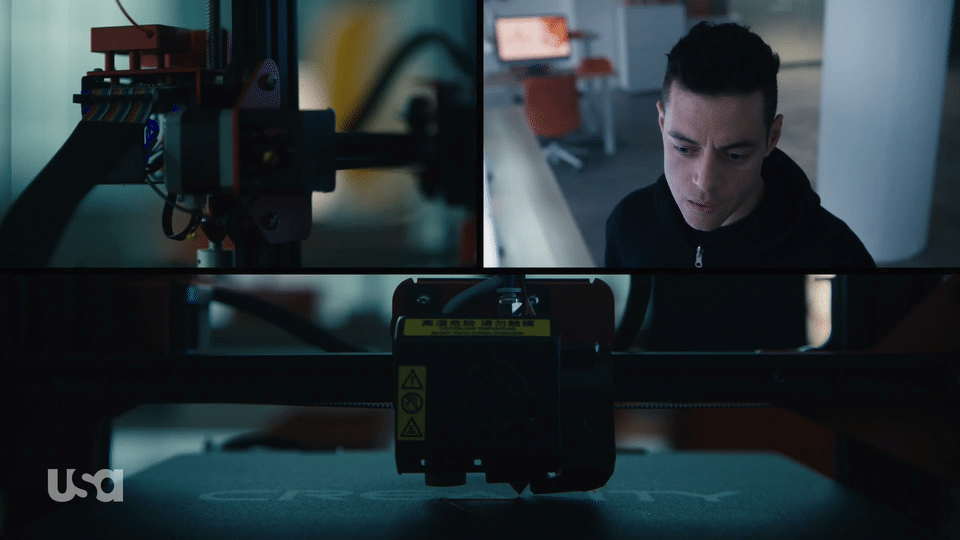
I recently recovered from a virus– thankfully, not the one everyone is concerned about. With nothing else to do, I started watching Mr. Robot (a television drama that is a mix between heist movies and Fight Club). In the final season of the show, there is a scene where the main character must gain access to a server room for a secure company in a shared workspace. Another fictional company that occupies this same building is a makerlab. In the show, characters use social engineering to obtain a fingerprint from one of the security guards in order to then sneak up to the makerlab. From there, they use software to create a 3D file from a grayscale photo and print the inverse for a mold. They quickly use some putty to create a fake fingerprint to use on a fingerprint scanner and then gain access to a restricted room to commit their nefarious acts. When I first saw this, I was screaming at my TV saying, “that’s not possible!” But, as I gave it more thought, I began to think maybe it was…
This article explores the crazy ways that movies and television have portrayed 3D printing and whether or not those ways are achievable or realistic. Surprisingly, sometimes movies are more fact than fiction.
Mr. Robot – 3D Printing a Fingerprint
To start, let’s look at the show that inspired this review. As described above, some hackers need to gain access to a room through a fingerprint-locked door. To do this, they lift a fingerprint from a phone screen and create a 3D file. They then invert and print it to create a mold for some putty. Using this putty, they easily gain access to the room.
Firstly, most fingerprint scanners are capacitive touch devices; they use electrical signals to measure the depth of the ridges in a fingerprint as well as the pattern. Using the grayscale pattern to create a texture map is definitely possible and even available in some free programs such as MeshLab. However, without having an actual data point of the height and location of a ridge, it is impossible to know how to scale the image vertically in order to match it exactly. In the same way, people are not machines and do not apply the exact same amount of pressure everytime they scan a finger. Therefore, the ridge depth can’t be a huge contributing factor to the scan– so, it seems plausible that you could create a working file. Would a 3D printer be able to print at a high enough resolution to achieve the correct fingerprint pattern? The average depth of ridges on a fingerprint are ~50um. While the FDM (fused deposition modeling) Ultimaker 2 printer shown in the movie probably wouldn’t cut it, there are plenty of printers that are capable of printing resolutions less than 50um– including some printers as cheap as $200.
In fact, researchers from Cisco Talos were actually able to achieve an unlock rate using several different fingerprint collection methods and 3D printing molds just as the show displayed.
Verdict: Fact!
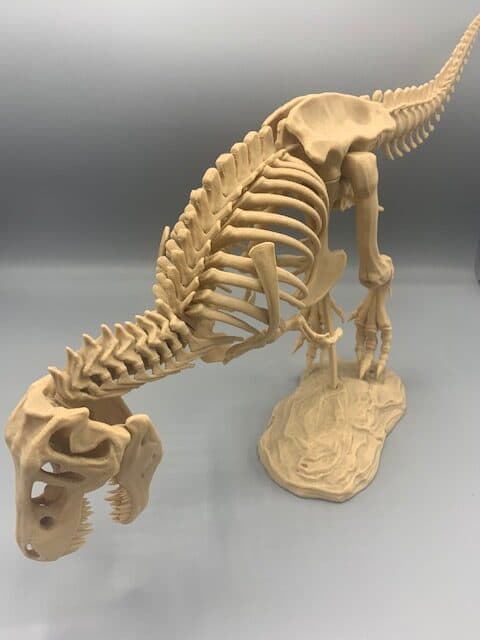
Jurassic Park 3: Printing Fossils

In Jurassic Park 3, a scientist uses a “rapid prototyper” and some scan data of a real fossil to recreate a scaled down dinosaur skull. Dinosaur fossils have regularly been scanned as catalog data while trying to limit the amount of actual interaction with the real fossil. This practice has been going on for decades and contributes to the wider knowledge of the scientific community. CT scans are common ways to collect 3D data of the fossils, and can be done so relatively quickly and easily. GE (General Electric) even makes a mobile CT scanning trailer that can be taken to an excavation site.
Once the scan data has been obtained, pretty much any 3D printer could provide a model of a dinosaur skeleton. Depending on the quality you are trying to achieve, the print technology may change. We have actually printed a small scale replica of a Tyrannosaurus Rex. Check it out!
Verdict: Fact!
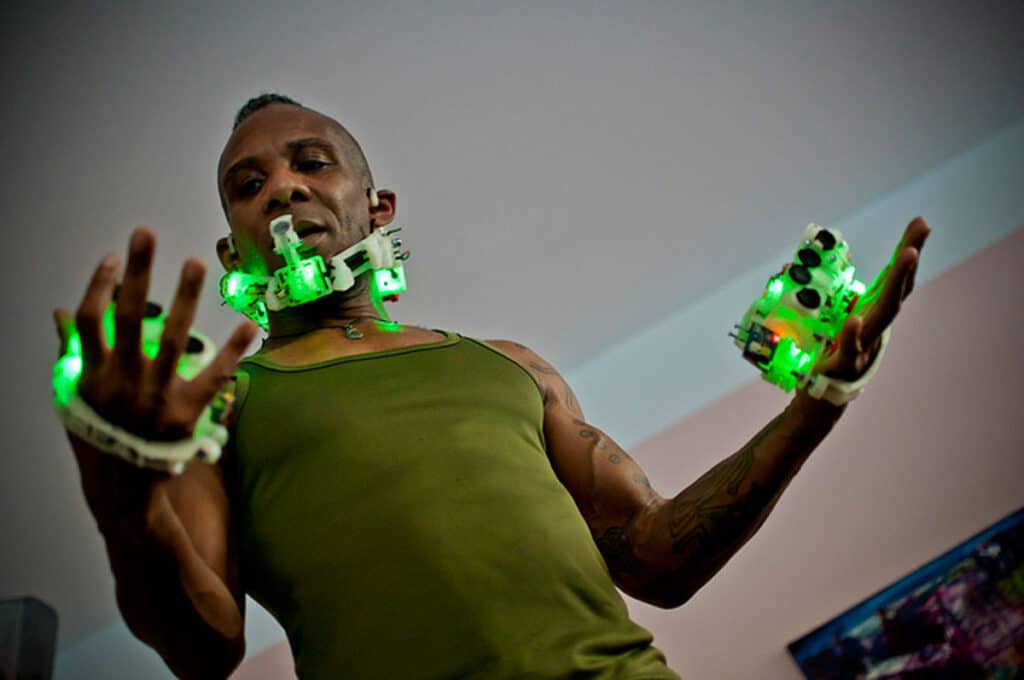
Westworld: Printing Bionic Robot Flesh
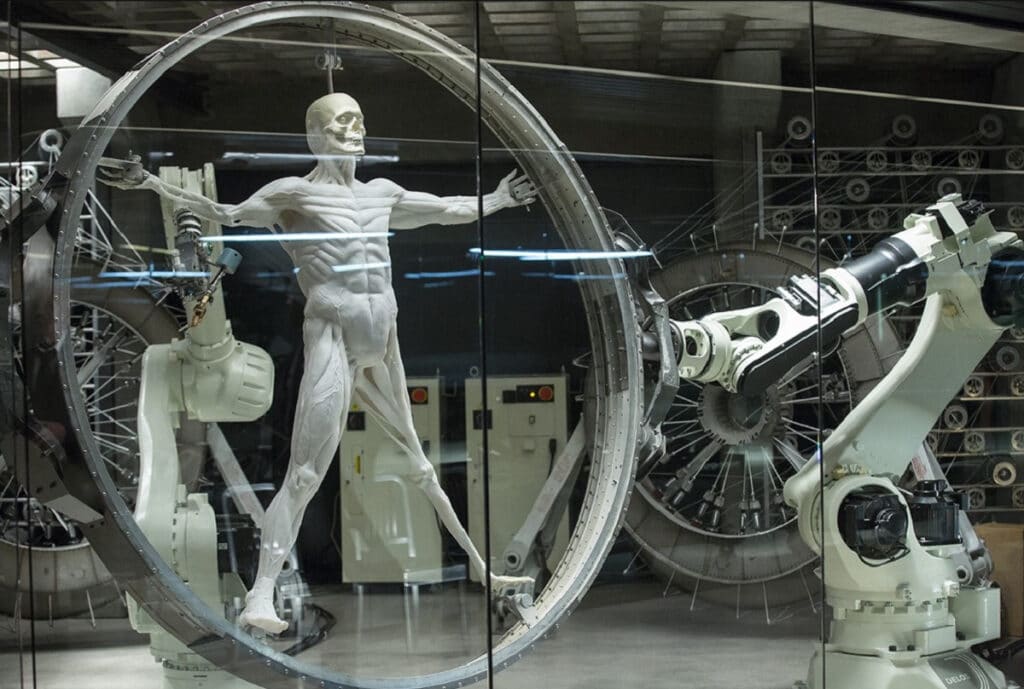
The series Westworld displays some nifty space-age looking robotic arms with some gooey, white biomaterial to create the flesh and bones of the robot citizens that inhabit it. The machine that it shows does exist… sort of. Robotic arms like these are used in all kinds of manufacturing plants– from automotive, to electronic, and more.They do have a sophisticated range of movement that allows them to move on multiple axes throughout space. They are programmed to do so with some machines even using AI and machine learning. The biomaterial printer also exists… again, sort of. There are many research and medical facilities currently using bioprinters to print tissue and other biomaterials. This process even looks similar to what is laid out in the Westworld opening with a syringe needle dispersing bio ink. However, the speed and scale at which Westworld’s machine operates is nowhere close to achievable or realistic. While rooted in a lot of reality, the process shown in Westworld is not possible at this time.
Verdict: Fiction!
Lost In Space: 3D Printing Medical Equipment
In the Netflix adaptation of the classic TV program, Lost in Space, 3D printers are used everywhere as a common appliance. Early on in the show, a crewmember hurts their leg and a brace is printed for them. While this show takes place in the future, everything that is seen in the show can be done today! The series does a great job of showing the actual capabilities of 3D printing as well as limitations: print times are realistic, support material is used, and a dual extrusion printer accomplishes multi material prints. Even the object being printed is realistic. Many organizations use scanned data along with 3D printing to create beautiful, ergonomic, custom braces and prosthetics for humans and animals alike! Even printing in space is possible as 3D printers are already in use on the ISS.
Verdict: Fact!
Star Trek- Replicator
Being one of the rare science fiction nerds who isn’t either a Star Wars or a Star Trek fan, I had never heard about the replicator until I started 3D design and printing… then I heard it everywhere. In the show, the replicator is a device that could essentially materialize anything you want that fits within its build volume… such as food, weapons, medicine, etc. The even better part of this concept is that anything you want to throw away could be put into the replicator to be broken down and recycled. While there is a 3D printer called the “Replicator,” there sadly is no machine that can achieve what the Star Trek replicator could.
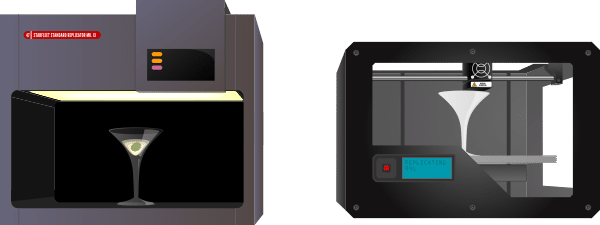
There are printers that can print weapons. There are printers that can print food items… chocolate printers and cheese printers. There are even bioprinters that can print drug capsules as well as the aforementioned tissue and other medical devices. However, there is no machine that can do all of this in a split second… and with no specific feed material.
Verdict: Fiction!
Conclusion:
3D Printing has grown rapidly in its capabilities over the last few decades. Sometimes fact is stranger than fiction.
Do you have any groundbreaking ideas to push 3D printing to the limit?
Reach out to The 3D Printing Store and let us help you with your project: project@the3dprintingstore.com
With live music essentially vanishing from the world this past year, I am inspired to start making my own music again– neighbors be damned. I recently started looking into electronic drum kits; they are all expensive. This led me to do what I commonly do in these situations: see if I could print my own. This has become a theme in my household… my wife has learned that when she asks me to buy something, what I actually hear is “can you print me something?” The answer most of the time is “yes, I can print it”– even if I still end up buying her what she wants rather than making it myself.
After doing a quick Google search, I found that not only could I print my own drum kit, but there is a readily available instructable with all of the parts, coding, etc. This meant I could make my very own drum kit… and with access to a whole slew of materials and printers at 3DPS it would be a fairly easy build.
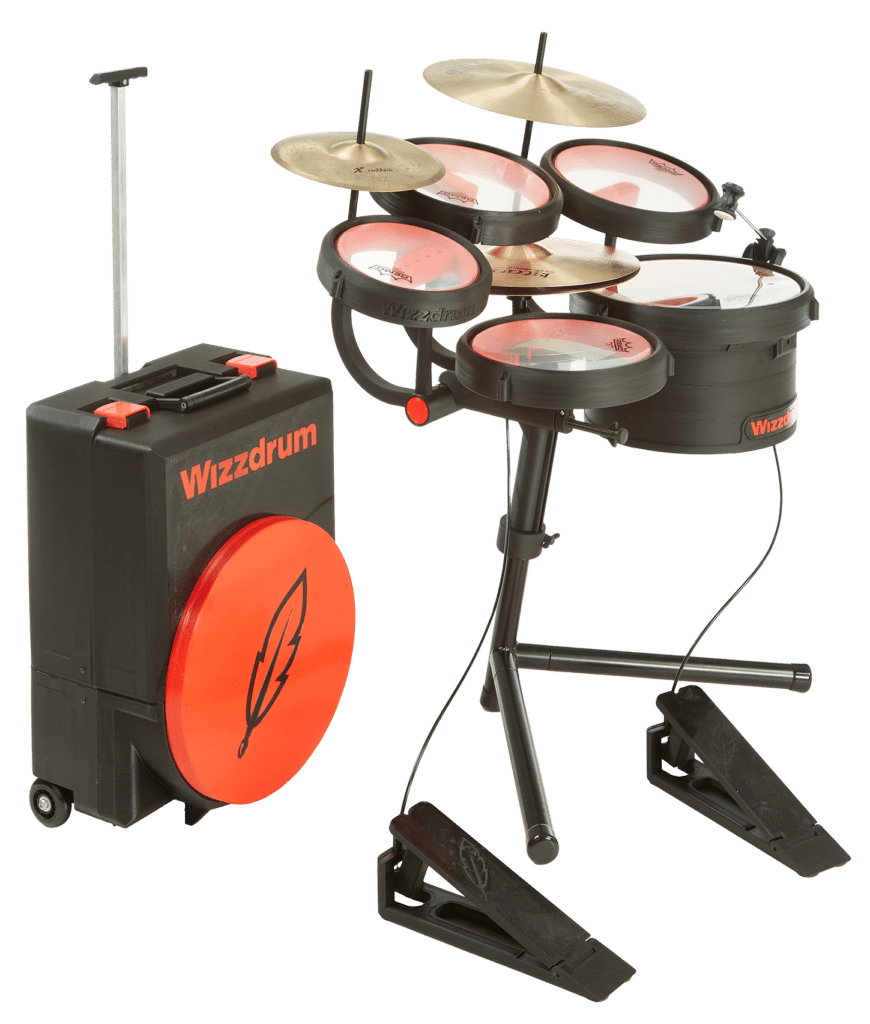
One user of these instructables, Ryo Kasaka, created a guide to build a single drum and then went on to create a full electronic kit using some basic contact microphones and Arduino ( an open-source electronic prototyping platform that enables users to create interactive electronic objects). Since this was posted almost 4 years ago now, several similar stories have come out about making both electric and acoustic drum kits using 3D printing. An example that stood out is Stratasys partnering with Panic! at the Disco– resulting in a full 3D printed transportable acoustic drum kit called “Wizzdrum” which is available for purchase right now.
While I still have not built my own kit, I am intrigued by using 3D printing and the intersection with creating music.
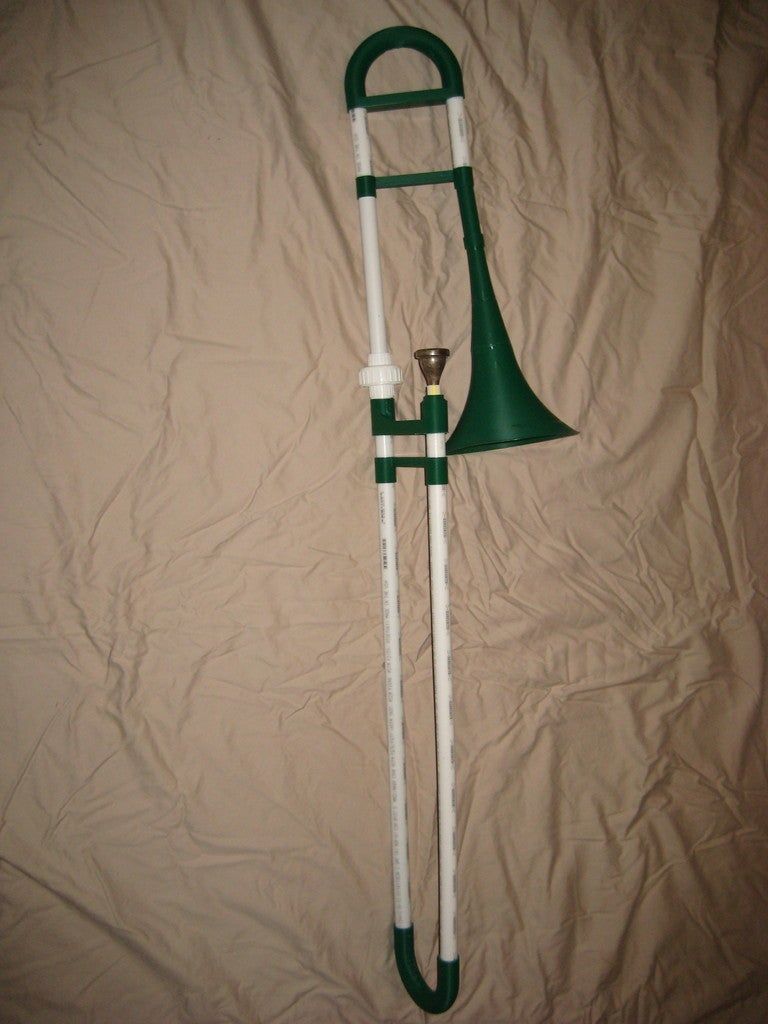
I also have a musician friend who plays trombone. When I consulted him about this idea about 3D printing and music, he mentioned instruments called pBones. They are essentially plastic trombones. The sound quality is surprisingly good and they can be a great alternative to expensive, heavy metal trombones. This is especially useful for young students who want to learn the instrument. Hearing that there was already a plastic trombone, I knew that there had to be existing files for printing a trombone available– sure enough, I was correct! There are designs available that use cheap plumbing tubing as well as fully 3D printed parts.
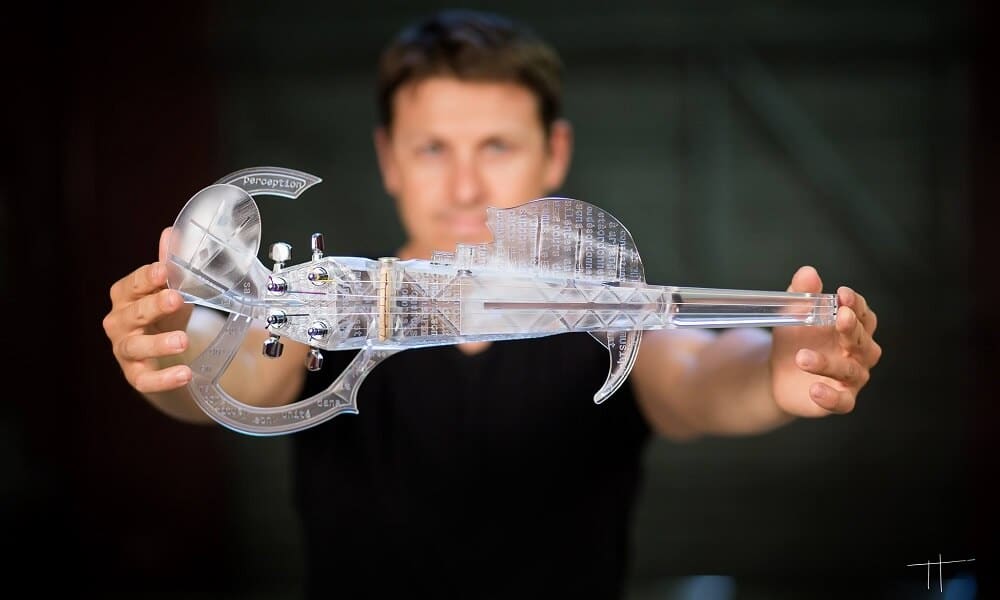
For less than $50, you can print a fully functional musical instrument for students to use for practicing and learning the basics. With many arts programs’ funding being cut throughout the country, it is thrilling to hear that students can use technology to create a more practical way to express themselves artistically. There are a plethora of instruments that can be created in a way that reduces price, weight, etc. that have already been made. From string instruments like violins, guitars, ukuleles– to woodwinds like recorders, ocarinas, and pan flutes– there are many ways to create music through 3D printing.
For trained musicians, there are also accessories to improve playing or experiences such as mutes, capos, and more. Even if instruments cannot be fully 3D printed, replacement parts can be created using 3D prints. 3D printing some parts may be cheaper than traditional manufacturing with a significant reduction in the overall price of instruments.
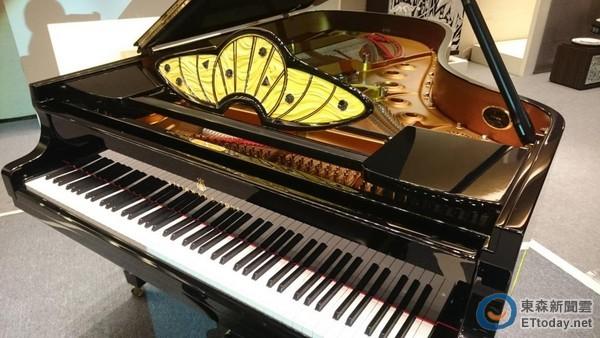
Another exciting option to consider is the creation of new instruments or redesigns of existing instruments using the unique capabilities of 3D printing. I imagine that 3D printing can be used to create interesting new air chambers and valves that would be impossible for traditional manufacturing to create. This allows for wild and unique sounds previously unheard of or new, more customizable instrument shapes that make them more ergonomic for a wider audience of people to play.
Playing an instrument had a huge impact on me during my formative years and I honestly believe it made me a better person. It taught me to practice, be on time, be creative, be expressive, think quickly, and many other positive traits. I carried these experiences with me into getting my engineering degree and ultimately into my 3D printing career. I envision a music classroom with 3D printed practice instruments for every student who wants one. Schools would no longer have to worry about budget cuts to their music programs because they could work with science and engineering classes to help print and create their instruments. I believe creating music is a useful skill that every person who has the desire to learn should pursue; seeing 3D printing making that more accessible to people is music to my ears.
If you have any exciting opportunities you think The 3D Printing Store could help with, reach out to project@the3dprintingstore.com or call 720-443-3733.
As our world and technology become more and more entwined, technology is able to accomplish increasingly more tasks for us. By becoming more efficient, we have gained more time to enjoy the things we love like music, activities, and the arts. But what about where technology and the arts meet?
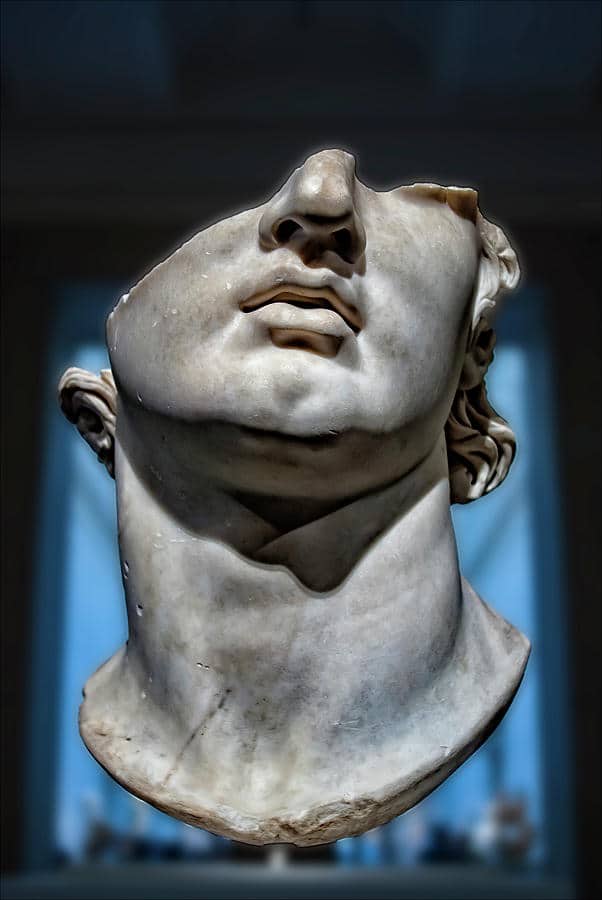
A masterful hand that has been well trained to produce the artistic vision inside one’s head is truly an inspiring sight. People flock to museums like Le Louvre and the Metropolitan Museum of Art to bask in the skill of these rigorously trained artists. Michelangelo once said “If people knew how hard I worked to get my mastery, it wouldn’t seem so wonderful at all.”
3D design software and 3D printers technology have made it easier for more people to easily share their true artistic vision with others– without having to spend decades training their hands to create the perfect masterpiece. There are even dedicated web resources for this exchange of ideas such as thingiverse, GrabCAD, and more where artists can collaborate and expand on each other’s ideas. 3D design and printing have also allowed for an iterative process in art– allowing artists to further hone their artistic vision without wasting as much material or time. These technologies can even be used for prototyping traditional art mediums where one costly mistake could mean having to restart the entire piece. There is an old adage in manufacturing: “measure twice, cut once.” But with 3D design, this saying becomes obsolete. If you make a wrong cut in design software, there is an undo. When you hit marble with a chisel imprecisely there is no ctrl+z.
3D printing as an art form has also allowed for the creation of things that would be impossible, nearly impossible, or much too time consuming to create before. This brings new life and previously unseen structures into our art– enriching nearly every aspect.
And it isn’t only fine arts like sculpture where 3D design and printing benefit artists. For example, in theater, these technologies allow for props to be made quickly, cheaply. and efficiently. This further immerses audiences in the world that the artists on stage are creating. Music has been created using cheaply manufactured 3D printed instruments; underfunded school programs and underprivileged households can continue teaching and learning music. Film has also widely adopted 3D printing for set building, stop animation films, miniature sets, costumes, masks, and many other props.
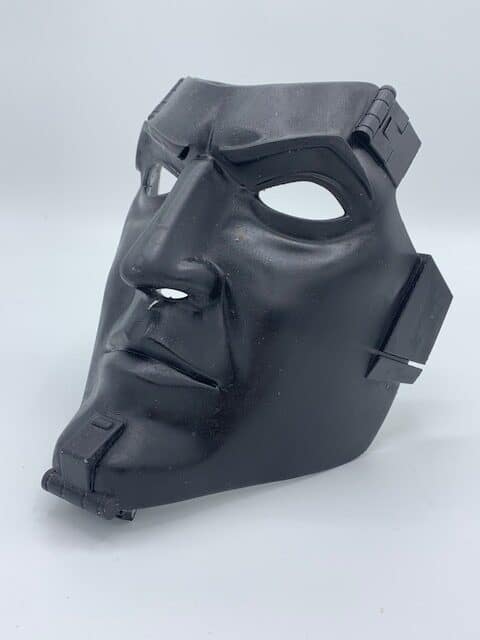
3D design and printing has allowed the creation of some of the most visually striking scenes and props in the last few decades to be made. Fashion has also adopted 3D printing to create dramatic pieces that are not possible through other means of manufacturing. 3D design and printing are slowly permeating all facets of art.
These technologies have also removed the demanding physicality of art. One such example of this is the project SHIVA (Sculpture for Health-care: Interaction and Virtual Art in 3D). This program was a partnership formed between the University of Lille, Bournemouth University, and the Victoria Education in the UK. The program developed tools that allowed users with various disabilities who could not hand sculpt their projects or mold clay to create art using 3D design software on disabled-friendly computers for production with 3D printers. 3D design software isn’t only helpful for disabled users; it can be easier for many users to use tools they are already familiar with like a mouse and stylus to create art rather than working with tools they might never have used.
I do not think 3D design and printing will ever replace traditional forms of art– nor do I think it should. However, it will become another tool in the larger toolbox for artists to create works of art that inspire us for ages. I look forward to seeing the beautiful creations artists and computers can work together to create. And, I hope that this influences more people to participate in the world of art using these artificial masterful hands as an extension of their own to bring their ideas to life.
If you have any exciting opportunities you think The 3D Printing Store could help with, reach out to project@the3dprintingstore.com or call 720-443-3733.
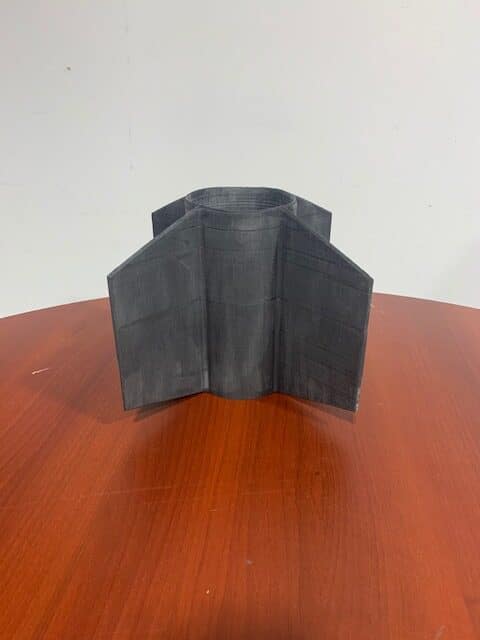
The Spring Grove Area High School (SGAHS) NASA student launch team had the goal this year to design, build, and fly a high-powered rocket carrying a scientific payload. As they worked towards their goal of achieving flight, they reached out to The 3D Printing Store to help print the tail fin of their full scale rocket, Aquarius.

The student launch team designed a 3D printed fin can for the rocket. The design of the fin can was optimal for 3D printing due to the straight fins being square to the body. 3D printing allowed for the part to be easily replaced if damaged as well as withstand high temperatures. The team contacted the 3D Printing Store to print the nearly 10-inch tall fin can out of a material with a high melting point. Several materials such as PEEK, PEI, and more were suggested with technical specifications provided for each. PEI was initially chosen for its high melting point and cheaper material cost.
The 3D Printing Store donated their services to help create some prototypes for the fin can. The first thing that we had to do was to make sure that the fin can would fit over the end of the rocket once printed. To ensure this, several test prints of a small section of the fin were printed to lock in the appropriate tolerance in order for the fin can to fit over the rocket easily, but also not be too loose.
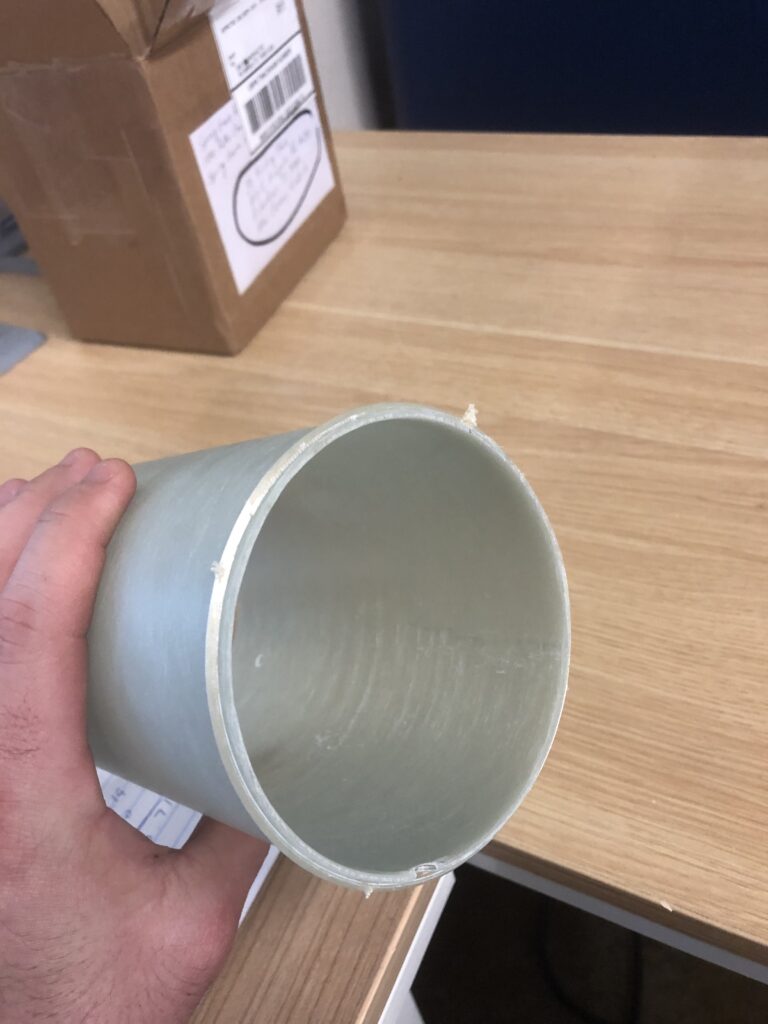
We printed the PEI fin can using the Intamsys 410 high temperature printer. M Holland, a 3D printing service and material supplier, donated some materials as well to help create the part. Unfortunately, the internal stresses from the material cooling kept causing the part to split along the printed layers of the fin can.
After continuing to look for a viable material option, The 3D Printing Store suggested using Markforged’s Onyx FR material to print the piece on the Markforged X7. This onyx material is composed of nylon with embedded chopped carbon fiber. This provides great strength to the part– making it more likely that the part would survive the flight and be able to be used for future flights as well. Even more crucially, the Onyx FR material has a high melting point and flame retardance which is ideal for this application.
Once the material was agreed upon, the part completed printing within 48 hours. Some light post processing was completed, and the part was shipped to the customer in time for their scored flight.
The rocket traveled to 4253 feet– just a short 147 feet off of their target altitude of 4400 feet. Both payloads functioned correctly as well. The rocket, including the fin can, was retrieved without damage and the flight data was submitted to NASA as the final scored flight.
Brian Hastings, the physics teacher instructing the student launch team, had this to say about The 3D Printing Store:
“In the end, the 3D Printing Store helped us find a material that would meet our needs: Onyx FR due to its high melting point and its ability to be flame retardant. We sent the 3D Printing Store our part file and a sample body tube for fit. A few test prints later, and the fit was perfect to meet our specifications. The part arrived undamaged and in time to be used on our scored altitude. The team at the 3D Printing Store were great to work with and kept us informed of the progress throughout the printing process.”
The student launch team is still flying. The deadline to submit scores is May 17 and the top 100 teams will be selected from across the country to compete at Nationals. So far, SGAHS has two teams with very good scores and believe they will advance to Nationals. All teams are continuing to fly. We at The 3D Printing Store wish them the best of luck in their future flights!
If you would like to follow the Spring Grove Area High School Student Launch Team’s success, check out their website at: http://springgroverocketry.weebly.com/. If you have any exciting opportunities you think The 3D Printing Store could help with, reach out to project@the3dprintingstore.com or call 720-443-3733.
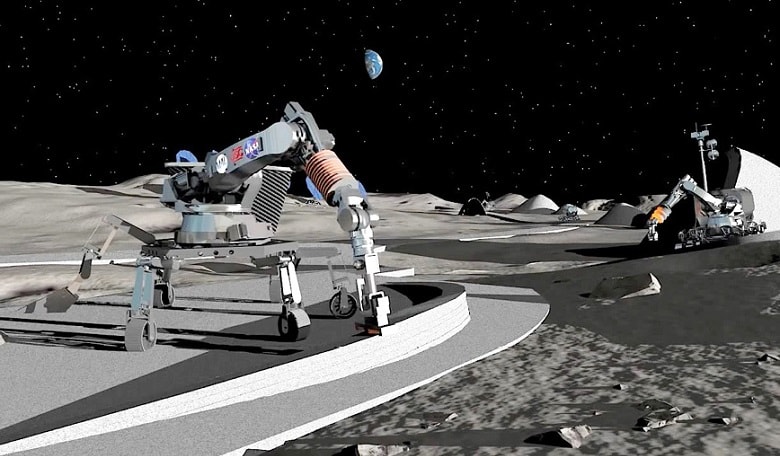
Recently, 3DPS spent a day with a global audience assembled for the #ADDITIV 2021 Aerospace Event. The panels were valuable to listen to and the audience was engaged. Aerospace continues to dominate the conversation for applications of additive manufacturing parts for airships, propulsion systems, rovers, and more– all parts of large projects going to space today or in the immediate future. The list of parts that can be 3D printed using some of the new composite materials and the super alloys is changing some of the conventional wisdom on how to make both rockets and their cargo.

There are many essays, panels, speakers, and virtual conversations about the impact of 3D printing particularly in the aerospace industry, but it is not fully embraced. There are still many questions that are being answered by experts, companies, and amateurs alike. There is still a lack of standards for both materials and processes. 3D printing standards, as they have been developed, tend to be specific to a particular company and even a specific part. This means that there are many standards and ways of making “certified” parts. With both NASA and commercial space using 3D printing to move the process of new parts and pieces along more quickly, we are no longer willing to wait for testing of parts that used to take months or years. The 3D parts that are on the Perseverance Rover demonstrate the speed that 3D printing brought to the final assembly of the rover. There are final parts on the Rover that were successfully printed and are now performing as planned on Mars.
It is debatable if this level of use of this technology would have happened even 10 years ago. The platforms, techniques, materials, software, and computer simulated testing have moved very quickly during the last 10 years– and even more rapidly over the past five years to make some of these advancements possible. There are also more qualified experts now that are able to both validate and explain the methods with the materials and testing to provide the level of assurances needed for the aerospace industry. Some of this expertise has developed rapidly and some of it has come from outside the mainstream aerospace industry. The democratization of 3D has brought to bear many disciplines and also challenged what we thought were unbendable principles of physics, chemistry, and material sciences.
Slade Gardner is a recognized expert in 3D printing, Lockheed Martin Fellow, and founder/CEO of Big Metal Additive. He recently noted the important role that aerospace has played in the development of additive manufacturing. They had the resources to commit to educating the workforce to use this technology. Slade has the vision of what is needed for the ongoing success of additive.
“Every discipline is involved in additive,” he said. “We need people of all backgrounds and educational skills and capabilities now because the additive market is growing so fast.”
We will still see rocket technology developed over 40 years ago being used for the near future. However, we will also see fully 3D printed rockets, rocket engines, and different means of propulsion that were not pursued in the past. They are already quickly becoming an important part of our space industry. There will undoubtedly be more and as we look to long term space travel and possibly colonization. We need to think about these technologies as absolutely essential.
As always, The 3D Printing Store team is available to provide demonstrations, professional development courses, and educational courses to you and your team. Contact us or email arausch@the3dprintingstore.com for inquiries.
3D printing is able to accomplish incredible designs that would be extremely difficult or impossible to machine. There are many benefits to this including: increased strength, weight reduction, assembly costs reduction, waste reduction, and more. Naturally, people want to see these benefits realized with materials other than plastic. Metal, ceramics, and more have all been added to the catalog of materials suitable for 3D printing due to increased interest and research. However, most metal additive manufacturing technologies require very different and expensive technology when compared to many of the plastic additive manufacturing technologies. Metal additive manufacturing (AM) primarily uses high powered lasers or electron beams to create parts. While this technology is impressive, it can also lead to many problems. This has led other printer and material manufacturers to investigate technologies that could be used to achieve metal parts at much lower production costs. Recently, there have been several companies to succeed in doing so. This article looks at the current drawbacks as well as new technologies that are helping democratize metal AM and may even allow users to print metal parts on their own home desktop printers.
Powder Bed Fusion Metal AM
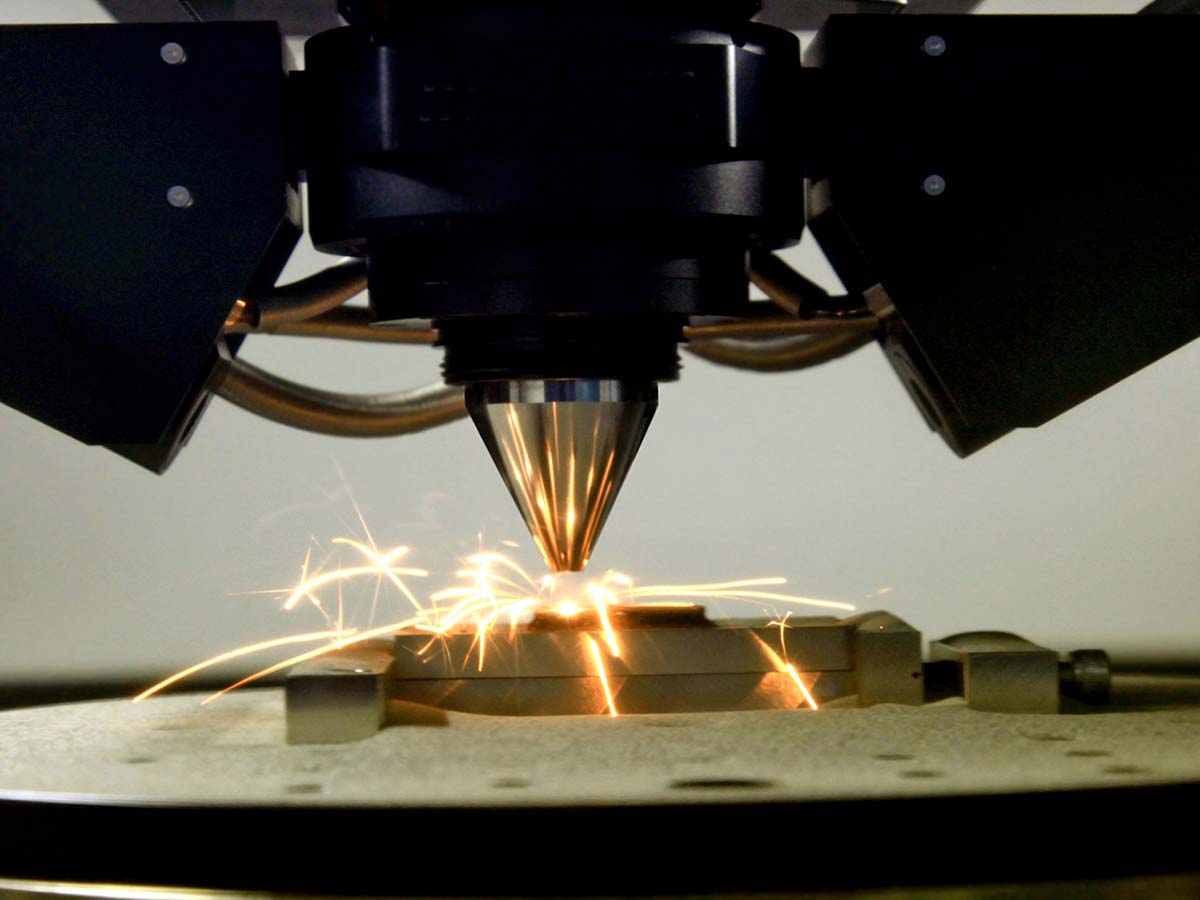
To better understand the deterrents associated with many of the metal AM technologies, it is first useful to understand how they work. Most of the metal AM printers available on the market are powder bed fusion technology printers. Powder bed fusion (PBF) printing describes several similar additive manufacturing processes which all use some high energy source to carefully melt fine metal powder together layer by layer. This is accomplished by raking a precise thickness of material across the print surface and allowing the energy source (typically a laser or an electron beam) to draw out the layer. Once the layer is complete, the build plate moves, another layer of material is raked across the top, and the process is repeated. Once the print is complete, the excess powder is carefully removed– usually with compressed air and can be recycled with new material at a specific ratio specified by the tool manufacturer. From there, the part can be sintered for further strengthening. The whole process is very fascinating and it results in strong, beautiful parts. However, the process also has some aspects that make it undesirable.
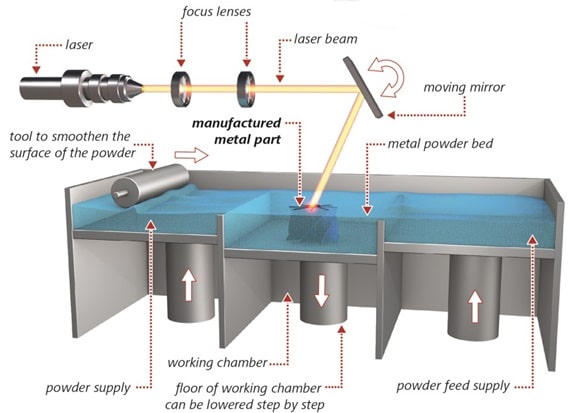
Metal powder is dangerous to work with as inhaling it is damaging to the lungs. It is also a skin and eye irritant. This means that anytime it is being handled, it must be done so with care to ensure the operator’s safety. Also, due to the packed bed technology, excess powder must be removed. While this material can be recycled, it must be mixed in with fresh material at a certain rate which leads to additional waste and expenses. The sophistication of the technology also comes with a price tag. High power energy sources are expensive pieces of equipment, and if they break and require replacement or repair, it is very costly. Also, they are expensive to run. Selective laser melting (SLM) machines are hundreds of thousands of dollars– making them accessible only to large companies that can afford the high upfront price tag. Additionally, setup and removal are difficult as changing between materials is cumbersome and part removal from the print bed usually requires machining to remove. Even operating the machines requires extensive knowledge of the specific metal material properties that are being printed in order to get the right amount of power to effectively melt the powder together.
PBF metal AM certainly is impressive and definitely has its use cases in industries such as aerospace, manufacturing tooling, automotive, and more. However, it is hard to justify the price and complexity for many jobs for people just looking to create functional prototypes, art pieces, or many other applications. On the other hand, fused deposition modelling (FDM) printing is cheap, easy to operate, and safe to use. Several companies have realized this and successfully developed materials and processes to print metal parts much more easily.
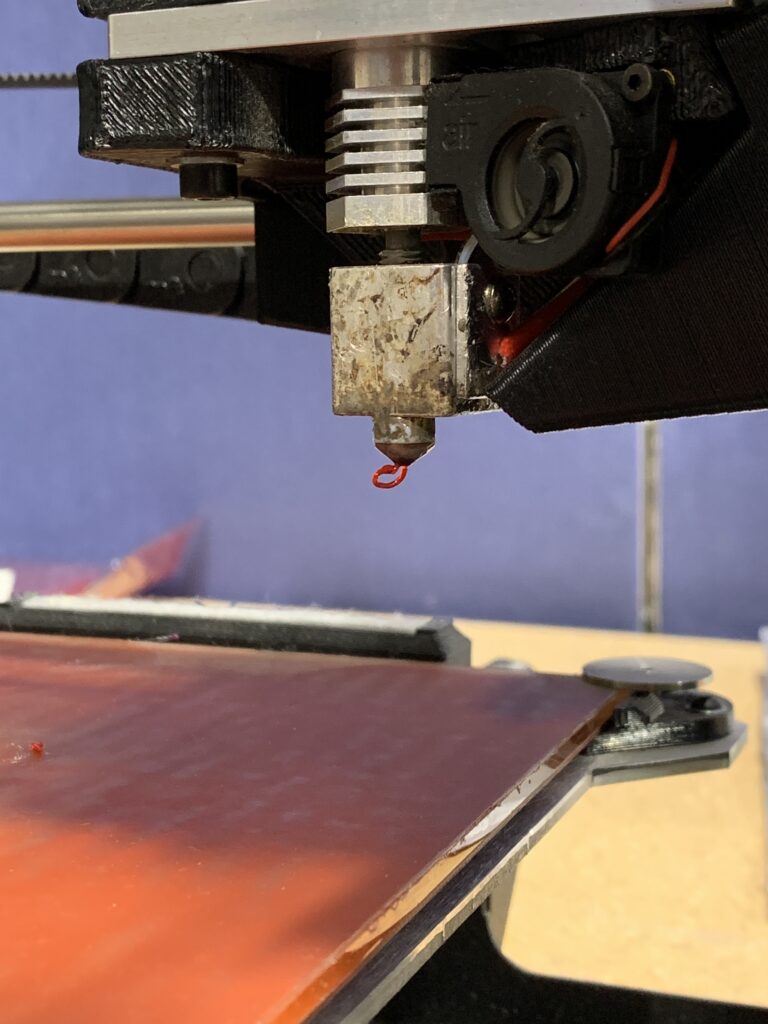
FDM Metal AM
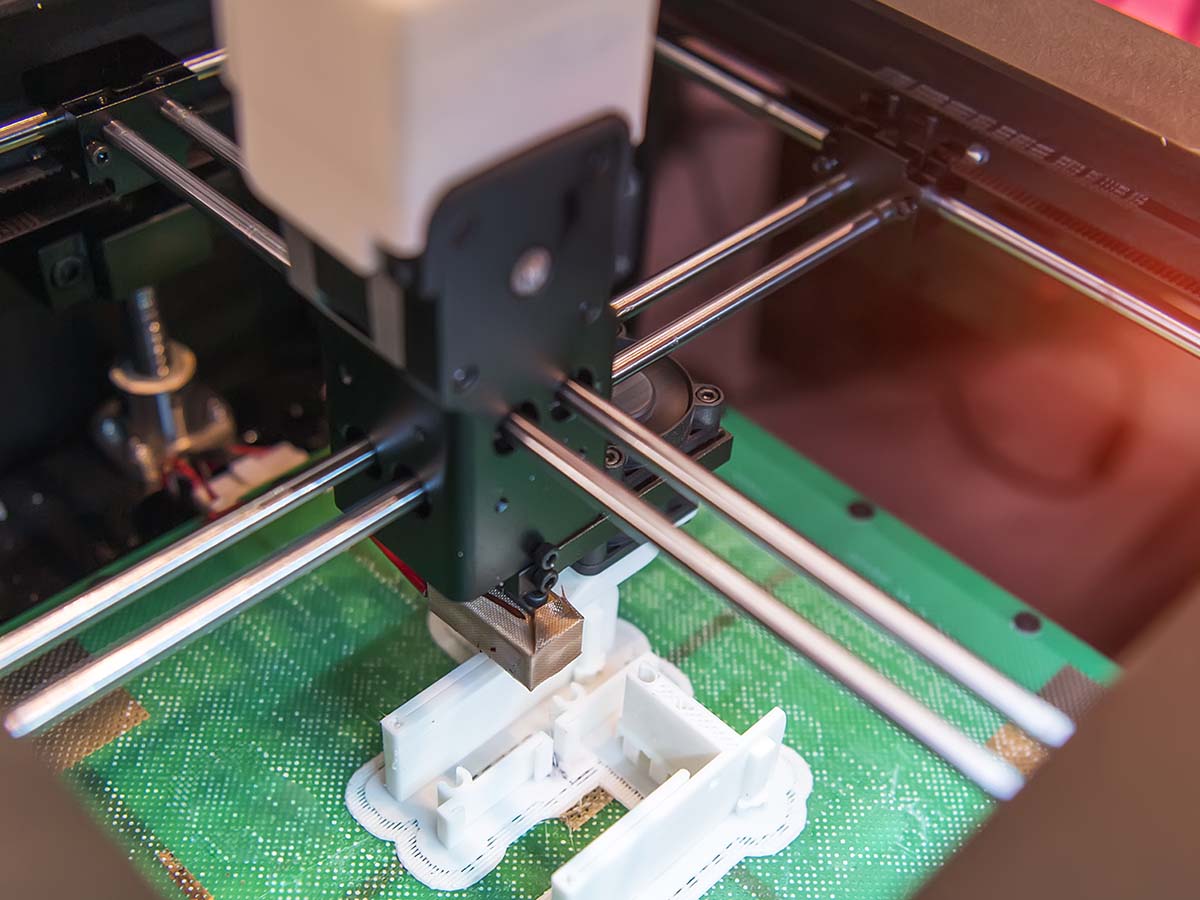
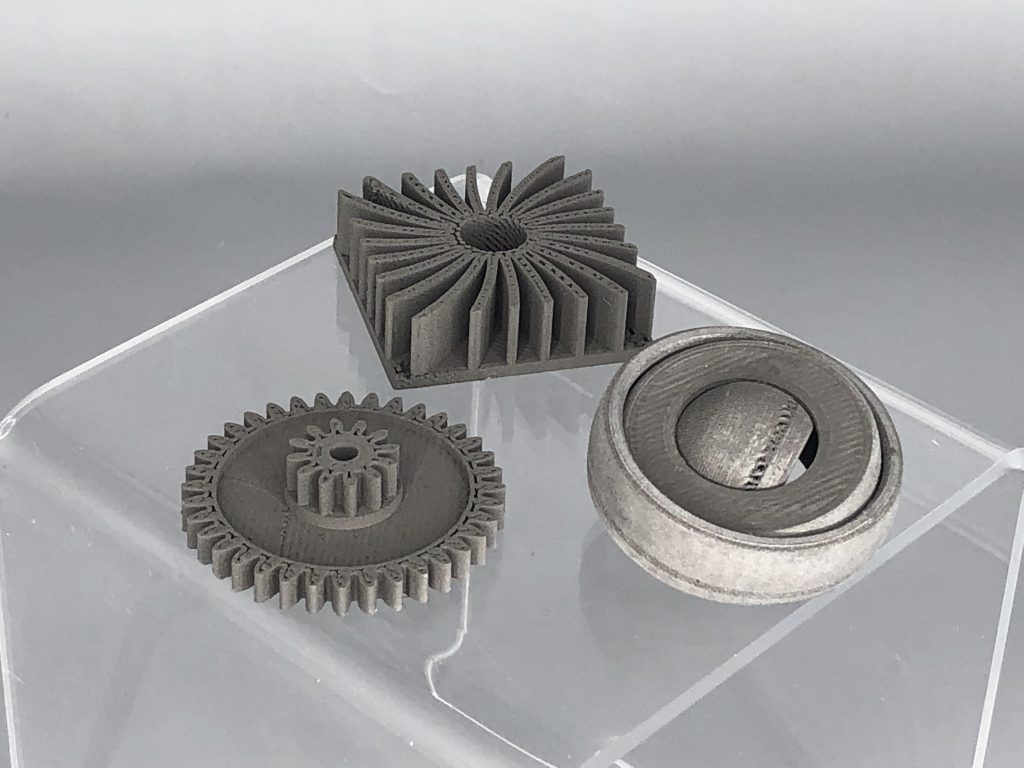
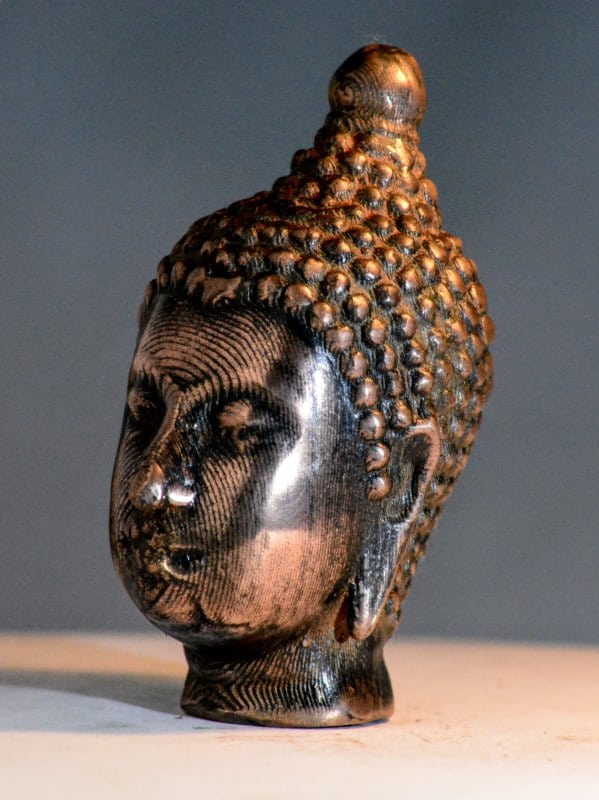
FDM printing is something that most people are familiar with by now. It is a fairly simple process. Filament of a specified diameter is pulled through a hot nozzle at around 200-300° C for most materials while the nozzle is moved in 3 axes to deposit material creating a part. But with such low nozzle temperatures, how can you print metal? Most metals melt at well above 1000° C! The clever way that this is circumvented is by creating plastic composites such as polylactic acid (PLA) with fine metal powder dispersed within the material. The weight of this being that with minimal modifications to the machine (a hardened steel or jewel tip nozzle), any desktop FDM printer can be used to print a metal part, including printers as cheap as the $200 Creality Ender 3. One company who The 3D Printing Store has worked with, and has seen great success in their materials catalog, is Virtual Foundry.
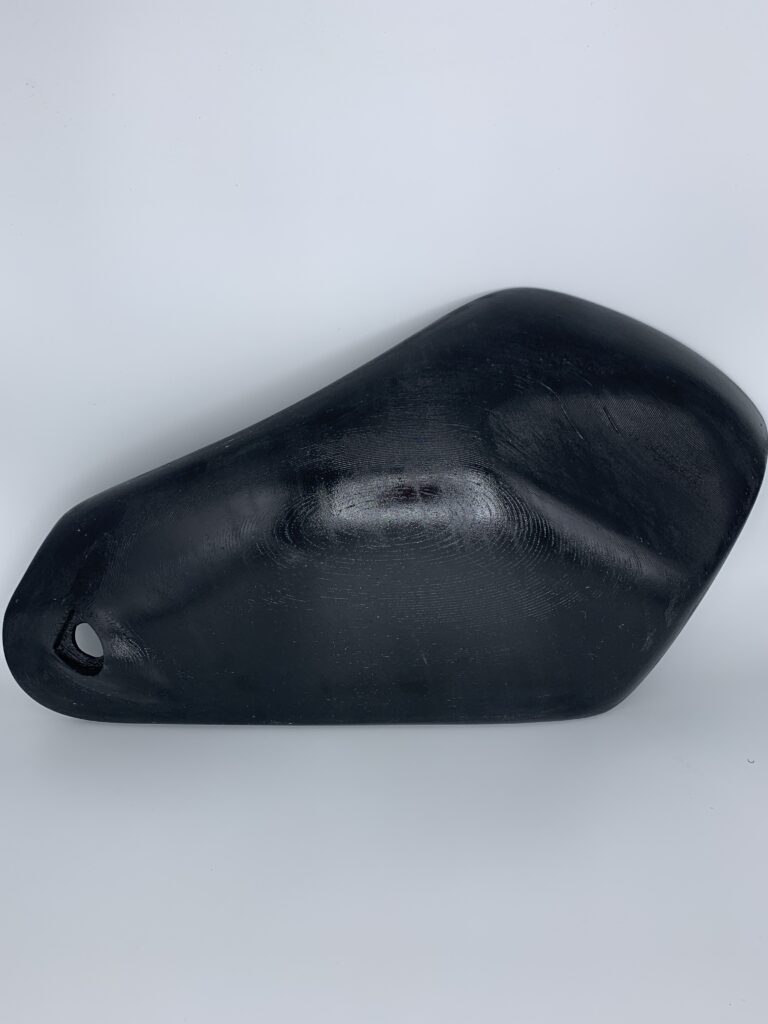
Using their bronze filament material, we have printed several parts on an 8 year old Makerbot Replicator 2 and seen similar success with many of our other printers using different materials.The price of printing parts is a factor of 10x cheaper than PBF printed metal parts. Since the powders are dispersed in plastic, safety is also no longer an issue. While support material is required, there is significantly less waste than PBF metal printing. Additionally, switching between metals is as easy as switching between any other material on an FDM printer. The parts can also be sanded after printing to achieve a higher quality surface finish. Once the parts are completed printing, they can also be sintered in order to remove the excess plastic deposited as well as strengthen the bonds between the metal particles. This results in a strong metal part that can be used for functional applications.
Some of the materials that are available are:
- Aluminum 6061
- Bronze
- Copper
- High Carbon Iron
- Inconel
- Stainless Steel
- Tungsten
- Titanium
… and more.
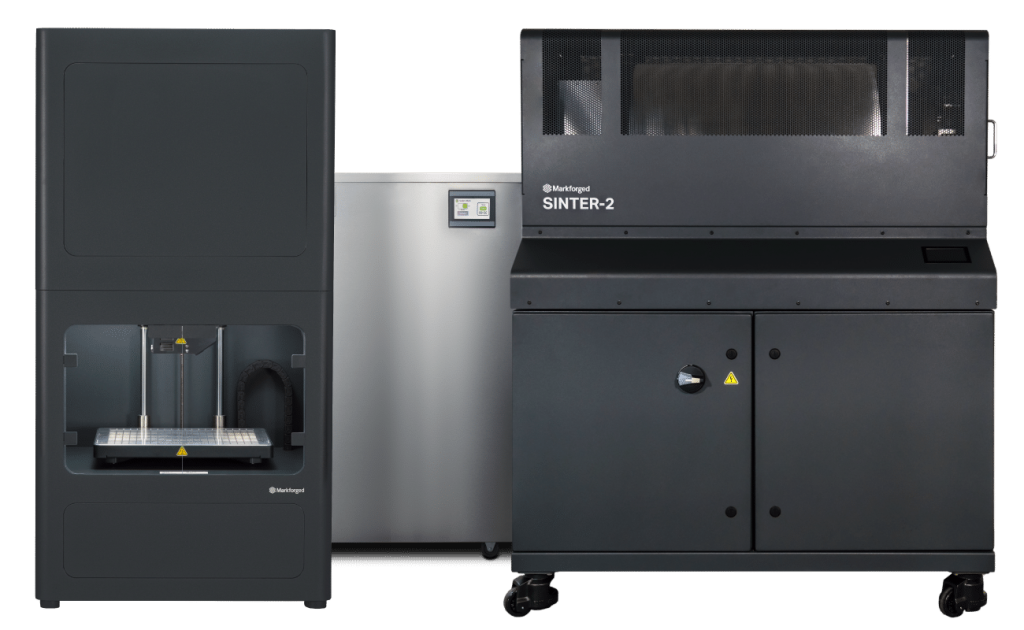
There are also other options that have a closed ecosystem such as the Markforged Metal X. The Metal X is a full metal system including the materials profiles, printer, sintering oven, and wash. It is more expensive than an at home FDM printer, but still less expensive to produce parts than using PBF printing.
It is important to note that FDM metal parts are not the same strength as machined parts, or even PBF printed parts, even after sintering. Due to the porosity inherent to the FDM printing method, the metal particles are not as strongly bonded. However, for applications without stringent mechanical and strength requirements, it is a great technique for achieving high quality complicated metal parts. Also, other interesting material properties are still captured when using this material as well. Examples are radiation shielding from Tungsten, conductivity from copper, or even oxidation of bronze. FDM metal printing accomplishes many of the same functions as PBF printing at a fraction of the cost– allowing more people to develop, prototype, and manufacture their next idea.
Metal AM has come a long way in a short time, and I think that we will continue to see it grow even more. The ability for people to now bring metal parts to their desktop printers has the potential to change product development; it is exciting to see products, art, and ideas come to life, shaping the future of manufacturing. In the same way that AM democratized the plastics manufacturing industry, it is now expanding into metal fabrication, ceramics, and more. While it is not a direct replacement for PBF metal printing or traditional metal manufacturing such as casting, forging, etc., it is a suitable replacement for many applications at a significantly cheaper price.
If you would like to print your next part in metal and realize the benefits of real functional metal parts, contact us at project@the3dprintingstore.com. To purchase your own virtual foundry metal filament, visit their website at https://www.thevirtualfoundry.com/
In Part 1 of this exploration, we examined how designing useful, functional parts is a significant barrier in the widespread adoption of 3D printing. We looked at what strides have been made already to address this issue and what the future might hold. In Part 2, we looked at how print preparation has contributed to massive frustration with printing– what has been and what might be done to improve this experience.
In Part 3, we will look at the actual act of printing and what is stopping printers from becoming automated manufacturing devices that we all have in our homes.
The Problem
I, myself, have no children. There are no children in my household, but remembering my own childhood, I would like to think that printers are a lot like children. Given proper attention, great instruction, and the right set of materials, they can both be great and contribute great things to the world. However, if you give them an inch, they take a mile. Also, if you ever get too comfortable, they somehow realize that and make you regret it. This may sound scary, but plenty of brave souls decide to have children anyway; similarly, many people decide to purchase 3D printers. The real masochists are the ones who do both and think they will provide prints on demand at the next birthday party.
In all seriousness though, printers can be hard to handle– especially at first. There are not a lot of moving parts or variables to control, but the parts that do move need to move accurately and reliably to produce a finished, recognizable, and usable part.
The biggest issue facing 3D printers is what plagues every machine– mechanical parts wear down and as they become worn; it can have disastrous effects. Many consumer printers use cheap parts made of weak materials that are easy to machine or manufacture. Ultimately, this gets printers out the door with a nice, low price tag; however, making the printer work reliably to do what it is supposed to do requires purchasing additional hardware and then figuring out how to install it properly. This understandably annoys many people and pushes them away from the idea of 3D printing completely.
Another issue with the printing process is time. In this digital age, the press of a button yields a decent cup of coffee in less than 2 minutes, a message is sent across the world in fractions of a second, and even packages can be shipped to you from an undisclosed location to arrive within 2 days of you clicking a button on a webpage. We have become impatient and 3D printing is by no means fast. While machines are getting faster and true scaled additive production is happening, most of those changes are being seen in the industrial space and are not in the world of consumer printing. Simple prints can take hours or days to print. While hours and days is fast from a prototyping standpoint in the manufacturing world, it is slow in the “I want it now!” consumer world.
Additionally, materials and color options continually frustrate 3D printing consumers. Many of the cost-effective printers can print any material you want…. as long as the material you want is PLA. More interesting 3D materials – ABS, PETG, TPU – and others that require special temperature settings, build plates, extruders, etc. are not suitable for most consumer grade printers. Even worse, most printers are only capable of printing a single color. If someone wants a finished multi-color part, they have to paint it, and if they want it to look nice it requires a significant amount of finishing.
Due to these reasons and many more, widespread adoption has not soared to the extremely ambitious levels that news organizations projected in the early 2010’s. But, in the last decade, significant advances have been made to address these issues.
Where We Are Now
3D Printing has slowly become easier and more approachable to the average consumer. From all the chatter I hear, many complaints and problems arise from the first two steps we discussed in the previous parts of this analysis: design and print preparation. This is because once a printer is printing, there isn’t a whole lot to do. Either the print works and the results are satisfactory to the user, or it fails and it is back to one of the first two steps typically to figure out why. Most failed prints are due to failures in the printer itself– through wear and tear of the components of the machine– whether it is the nozzle, belts, buildplates, or something else.
Over the years, manufacturers have started to consider and design around the fact that average
users need to maintain and repair their machines. Drop-in replacement assemblies are being sold that can be changed out as easily by removing a few screws. Many of the foreign produced, cheap consumer printers are now investing in creating better translated instructions and tutorial content to describe proper maintenance and repairs. Problems are becoming easier for the layman to solve. However, there are still many issues that are difficult to diagnose or repair.
Print times on consumer printers have not improved to any measurable degree. That can be attributed to the technology most consumer printers use: FDM (fused deposition modelling). This process is inherently slow as it physically traces out the entire slice of the finished model. Print technologies like DLP (digital light projection) can flash an entire layer in an instant and cure an entire build plate area in seconds. These machines are coming down in price as well and many consumers are making the jump from FDM to the resin based printers. However, I do not foresee this taking off on a large scale because resins are volatile and difficult to work with– especially for home use. In the FDM world, higher end components are able to be sourced at lower prices as more people are purchasing printers. These higher end components allow prints to be run at higher speeds, but these improvements are all marginal and prints are still going to take hours, not minutes.
As for multimaterial and multicolor printing, there are improvements there as well. More machines are offering multiple extruders and third party add-ons, like the Mosaic Palette, are allowing for single extruder printers to be turned into multi-material multi color printing. However, most of these printers require more knowledge of the printing process to print reliably. They also only allow for a couple more colors– not full color printing like some industrial printers offer. They also come at an additional cost that may not be worth it.
Check out our blog on multi extrusion printing here!
While many advancements have made 3D printing more appealing to the average consumer, there are still many drawbacks that manufacturers need to address to get the widespread adoption they are looking for.
The Future
I do see 3D printer companies solving many of the problems and I see several paths forward to accomplish this.
There is no way to prevent mechanical parts from getting damaged. However, just like quality ingredients make quality food, so too does quality hardware make quality prints. I believe that as printers become easier to operate, an increased interest will drive demand up. This increase in sales volume typically means more expensive, higher quality parts will cost less.
Also, 3D printers could become even more modular. I foresee in the future that when a nozzle is clogged (one of the most frequent FDM failures) it could be as easy as sliding in a new nozzle while the old one is cleaned and prepared for use again.
Another issue that is already being attempted to be solved is diagnosing print failures, and making failing parts easier to recognize. Future printers could be equipped with a suite of sensors that measure temperature fluctuations, stepper motor skipping, etc. This software could then be programmed to stop the print and notify the user to fix the particular issue. Even further down the line, AI and machine learning could be used to predict issues before they happen and correct for these issues on the fly.
Print times will be a tricker problem to solve. FDM printing is limited in how fast it can print– not only by the accuracy of the machine moving at higher speeds, but also the material properties of whatever it is printing. New materials will need to be created that set or cure quicker. New technologies are being developed to make printers operate faster, but the price for many of these systems is cost prohibitive to the consumer market. Software will also need to be upgraded to create more sophisticated printing methodologies. It will need software, hardware, and materials working harmoniously to create products more quickly, and all of this needs to occur without changing the end price of the product too drastically.
Finally, the limitations that printers face like color, materials, and size need to be tackled from several directions. Full color FDM machines, like the Rize XRize, already exist. If these systems could be ported to cheaper versions of the FDM printer, this could solve the monochromatic problem that FDM printers currently face. Multi-material printing will require more material research. Maybe some third party equipment will be able to join seams between materials to create stronger bonds than the current method of using an adhesive compound. Materials companies and printers companies need to work together to help grow the market rather than locking down materials with a specific printer manufacturer. Again, as demand for higher quality printer parts increases, lower parts costs should allow for improved capabilities of lower cost printers, unlocking a wider range of material options.
3D printing is a revolutionary technology, and in the hands of professionals with professional industrial equipment, it can be used to accomplish all types of projects. Let us help you with your next project by contacting our team of highly skilled operators at project@the3dprintingstore.com.
As always, The 3D Printing Store team is available to provide demonstrations, professional development courses, and educational courses to you and your team. Contact us or email arausch@the3dprintingstore.com for inquiries.